Budget-Friendly Framing: Make Your Art Shine
Jessica Adamec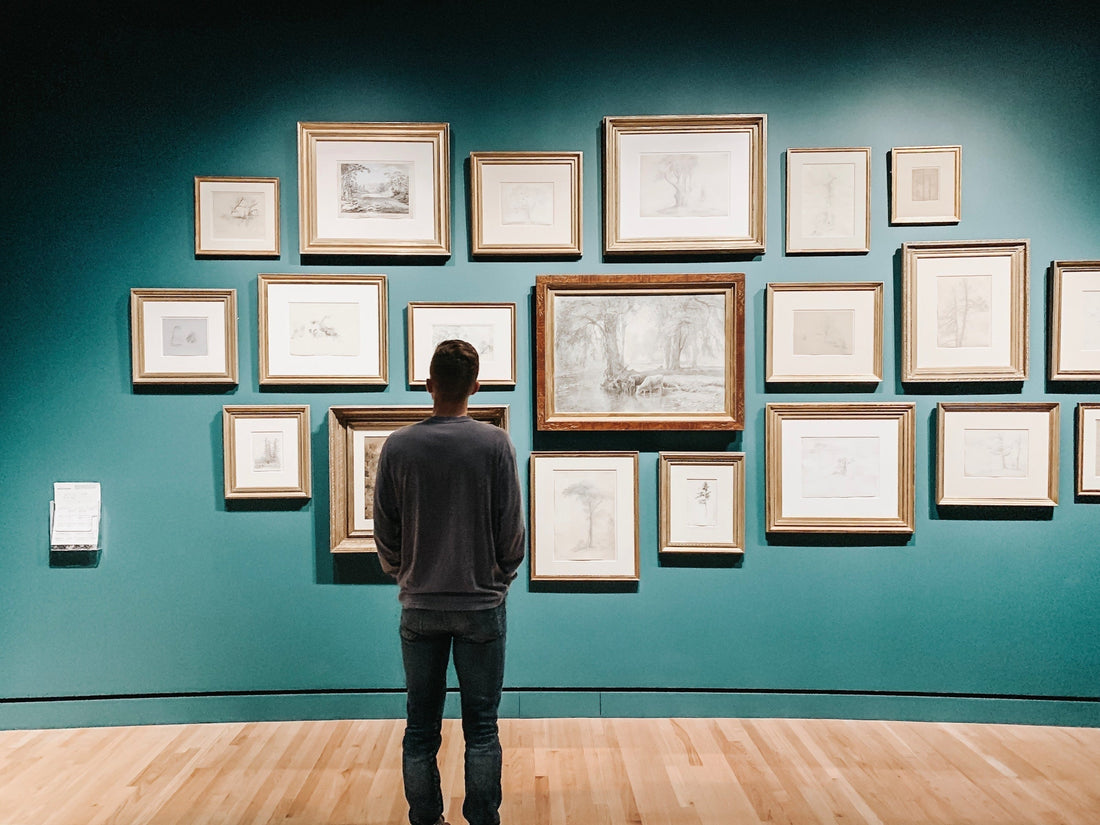
Photo by Derick McKinney on Unsplash
Framing your art doesn’t have to be complicated or expensive. Whether you’re styling a new print in your living room or refreshing a space with your favorite piece, the right frame can turn your art into a true focal point. In this guide, you’ll learn how to frame affordably, choose the best materials for nature-inspired artwork, and make your space feel more intentional and peaceful.
Quick Tips:
- Use natural wood for a warm, organic look
- Try ready-made or thrifted frames to stay on budget
- Add a mat to make any art feel more high-end
- Hang at eye level and group intentionally for maximum impact
Frame Styles That Complement Nature-Themed Art
When it comes to nature-inspired pieces, the frame you choose can amplify the artwork’s beauty and blend effortlessly with your existing décor. Here are some popular framing styles that pair beautifully with all things nature:
Natural Wood Frames
Light or medium-toned wood frames echo the textures of trees, water, and earth you might see in the artwork itself. If you prefer a minimalist look, go for clean, unadorned wood. If you love texture, choose a wood grain with visible knots and patterns to add interest.
White or Off-White Frames
For a crisp, modern look, white or off-white frames provide a bright border that helps the color in your artwork stand out. This style is especially striking for watercolor landscapes, botanical prints, or abstract renditions of the outdoors.
Metal Frames
If your space leans modern or industrial, metal frames in black, silver, or gold deliver a sleek, contemporary style. A bold black frame can create a dramatic silhouette around a gentle nature scene, while gold or silver frames add a hint of warmth and sophistication.

Photo by Angèle Kamp on Unsplash
Affordable Framing Options That Don’t Compromise on Quality
Framing doesn’t have to break the bank. With a bit of creativity (and maybe a weekend project), you can find or create frames that give your art a high-end look on a more modest budget.
Ready-Made Frames
Ready-made frames are an easy, budget-friendly choice. Many home and craft stores carry a wide variety of standard sizes, and some even come with matting included. A mat not only adds a professional touch but also guides the viewer’s eye straight to your artwork.
DIY Framing
For a more personalized approach, buy an unframed print and handle the framing yourself. You can pick the exact style, color, and size you want, and you’ll often find bargains on frames and materials at local craft stores or online.
Thrifted and Vintage Frames
Thrift stores, flea markets, and antique shops are treasure troves for unique, high-quality frames at wallet-friendly prices. A bit of sanding, a fresh coat of paint, or a new mat can breathe life into an old frame and give it a fresh, modern spin.

Photo by Patrick Hendry on Unsplash
Want more ideas for styling your art beautifully and affordably?
👉 Grab my free guide: Infuse Your Home with Nature’s Magic – packed with tips for choosing colors, placement, and peaceful design.
Add a Mat for a Professional Touch
Mats aren’t just decorative; they also create breathing room around the art, drawing attention to the details and colors.
Choose the Right Color
Neutral mats, such as white, cream, or soft gray, are a classic, versatile choice for most pieces. They help accentuate the art’s palette without stealing focus. If you’re feeling bold, try a darker mat (charcoal or forest green) to highlight specific tones in the artwork.
Mat Size and Proportions
A wide mat can make smaller prints look more substantial, lending them a gallery-worthy feel. Larger pieces often do well with a narrow mat that frames the art without overwhelming it.
Double Matting for Depth
For extra visual interest, use two mats of different colors or textures. The inner mat provides an accent to the artwork, while the outer mat refines the overall look.

Photo by Hermes Rivera on Unsplash
Hanging Tips: Bringing It All Together
Once your art is framed, displaying it correctly can make all the difference in how it transforms your space.
Hang at Eye Level
As a rule of thumb, position the center of the artwork around 57–60 inches from the floor. This makes it easy to appreciate the piece without straining or stooping.
Groupings and Arrangements
If you have multiple framed pieces, consider a gallery wall. Mixing frame styles, sizes, and colors can create a dynamic, curated look that still feels cohesive. Lay out your arrangement on the floor first to experiment with different configurations before committing to the wall.
Balance and Spacing
Leave a consistent gap (around 2–4 inches) between frames so each piece stands out. This spacing keeps a sense of harmony, especially when showcasing several pieces on the same wall.

Photo by Lefty Kasdaglis on Unsplash
Conclusion
Thoughtful framing can turn your art from “just nice” to truly striking, without breaking the bank. Whether you prefer sleek black metal or warm natural wood, there’s a way to highlight your nature-inspired artwork with ease and style.
Ready to bring new life to your walls? Explore my print collection and find the perfect piece to frame and display in your space to make your home feel like you.
